Integrating Moesif and Kong Konnect
Overview
In this guide, you will learn how to integrate Moesif with Kong Konnect using the Kong-Moesif Plugin.
Background
The Moesif Analytics Plugin for Kong Konnect integrates as a custom plugin in your control and data planes for Self-Managed Hybrid gateways.
Before You Start
- Make sure you have active accounts in Kong Konnect and Moesif.
- Install Docker
Also make sure you have your Moesif Application ID:
- Log into Moesif Portal.
- Select the account icon to bring up the settings menu.
- Select Installation or API Keys.
- Copy your Moesif Application ID from the Collector Application ID field.
Set up Kong Gateway Docker Image With Moesif Plugin
- Clone the Kong Konnect Docker demo repository.
It contains the Kong Moesif Plugin.
git clone --recurse-submodules \ https://github.com/Moesif/moesif-kong-konnect-docker-demo.git - Enter the repo’s root directory and build the Docker image. This installs the Moesif plugin
in your Data Plane node.
 cd moesif-kong-konnect-docker-demo && \
 docker build -t custom-kong-gateway:3.9.0.0 .
Create and Deploy a Hybrid Gateway
These steps create a Self-Managed Hybrid Gateway and deploys the Data Plane node with the Moesif plugin.
- Log into Konnect UI.
- Go to Gateway Manager.
- Select + New Gateway and then select Self-Managed Hybrid as the deployment type.
- In the General Information section, enter a name for your gateway and optionally a description. Then select Next Step. This creates your gateway and the Gateway Manager now has this gateway selected.
- Go to Data Plane Nodes and then select Configure data plane.
- In the Create a Data Plane Node dialog, select Linux (Docker) as the platform type and then select Generate certificate.
- Kong Konnect provides a
docker runscript to set up and deploy your Data Plane node. Copy the script. - Update the
docker runscript to include the following environment variables:-e "KONG_PLUGINS=bundled,moesif" \ -e "KONG_LUA_PACKAGE_PATH=/tmp/custom_plugins/?.lua;;" \ - Then substitute the image name to run with the custom Gateway image
custom-kong-gateway:3.9.0.0you built earlier. The script looks like the following:docker run -d \ -e "KONG_ROLE=data_plane" \ -e "KONG_DATABASE=off" \ -e "KONG_VITALS=off" \ -e "KONG_CLUSTER_MTLS=pki" \ -e "KONG_CLUSTER_CONTROL_PLANE=ea7f6198f2.us.cp0.konghq.com:443" \ -e "KONG_CLUSTER_SERVER_NAME=ea7f6198f2.us.cp0.konghq.com" \ -e "KONG_CLUSTER_TELEMETRY_ENDPOINT=ea7f6198f2.us.tp0.konghq.com:443" \ -e "KONG_CLUSTER_TELEMETRY_SERVER_NAME=ea7f6198f2.us.tp0.konghq.com" \ -e "KONG_CLUSTER_CERT=-----BEGIN CERTIFICATE----- -----END CERTIFICATE-----" \ -e "KONG_CLUSTER_CERT_KEY=-----BEGIN PRIVATE KEY----- -----END PRIVATE KEY-----" \ -e "KONG_LUA_SSL_TRUSTED_CERTIFICATE=system" \ -e "KONG_KONNECT_MODE=on" \ -e "KONG_CLUSTER_DP_LABELS=type:docker-linuxdockerOS" \ -e "KONG_ROUTER_FLAVOR=expressions" \ -e "KONG_PLUGINS=bundled,moesif" \ -e "KONG_LUA_PACKAGE_PATH=/tmp/custom_plugins/?.lua;;" \ -p 8000:8000 \ -p 8443:8443 \ custom-kong-gateway:3.9.0.0 - Run this modified
docker runscript in your terminal to start your Kong Gateway.
Set up Kong Moesif Plugin in Control Plane
- In Konnect UI, go to the Gateway Manager and then open your control plane.
- Go to Plugins from the navigation menu and then select New Plugin.
- Go to the Custom Plugins tab and then select Create in Custom Plugin.
- Upload the
schema.luafile of the Kong Moesif plugin. - Make sure that you can view the schema in Preview.
- Select Save.
- Go back Plugins, select Custom Plugins, and enable the Moesif Plugin.
- Enter your Moesif Application ID in the Application Id field.
- Select Save.
Test the Integration
These steps set up a Gateway Service and associates a route with the Service. This makes the API ready to receive and respond to requests.
Create a Gateway Service
- In Konnect UI, go to Gateway Manager and select your Hybrid gateway.
- Go to Gateway Services and then select + New gateway service.
- Enter a name for your Service.
- Define the endpoint for the Service. This corresponds to your upstream backend.
Either specify the full URL—for example,
https://httpbin.org/, or the elements of your service by specifying its protocol, host, and other details. - Select Save.
Add a Route to the Service
Saving your Service takes you to its details screen. From there, follow these steps:
- Go to the Routes tab and then select + New route.
- Enter a name for the route.
- Set up the route configuration:
- Set a path, for example—
/test-service. - (Optional) Specify the HTTP methods you want to allow for this path.
- (Optional) Specify domain names to match the route.
- Set a path, for example—
- Select Save.
Send Some Test Traffic
Use Insomnia or another HTTP client like cURL to send some requests to the endpoint
corresponding to the route you created. For example,
the following shows a GET request with cURL and the response:
curl -X GET http://localhost:8000/test-service
You should get a successful response.
To verify that Moesif has started capturing API traffic in real time, follow these steps:
- Log into Moesif Portal.
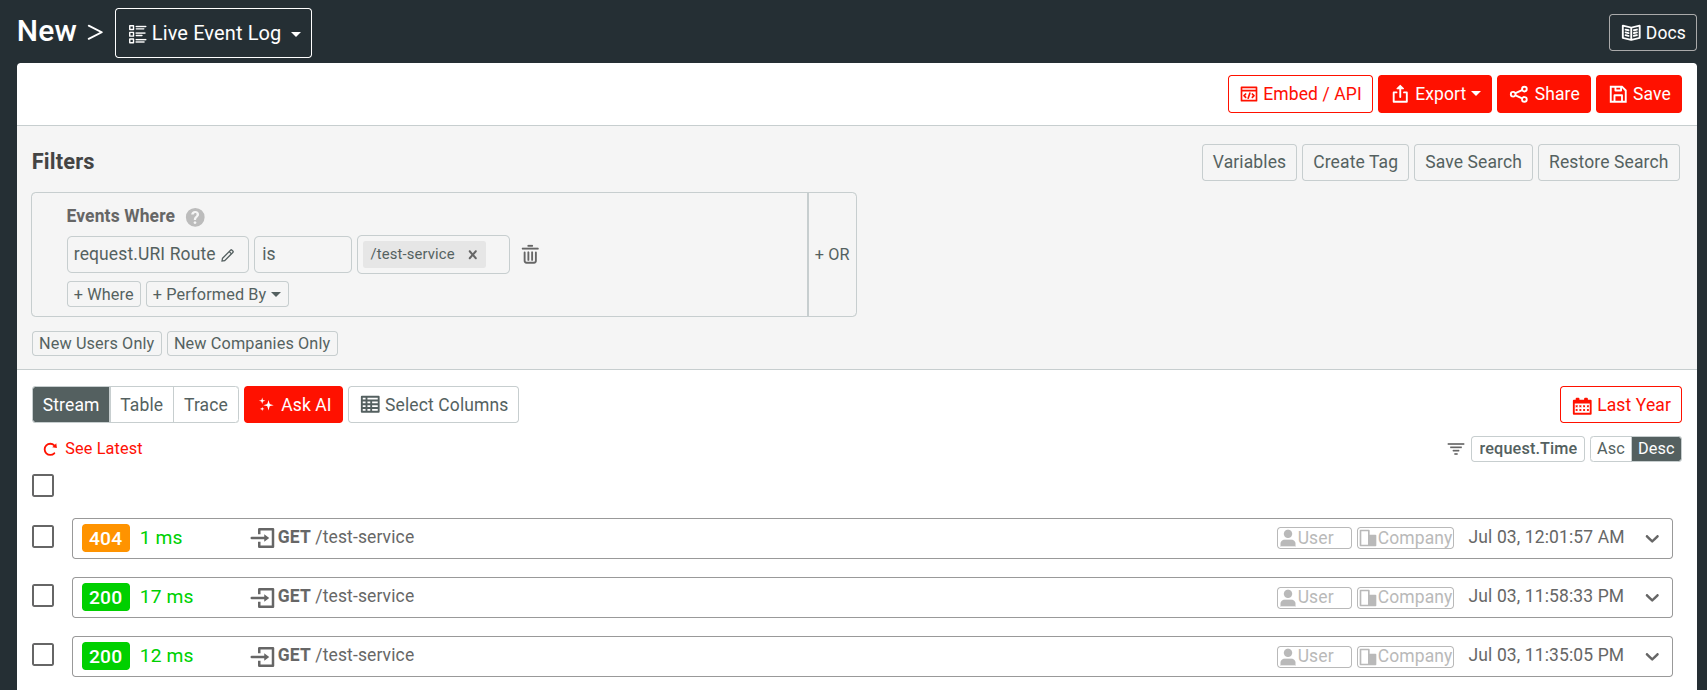
- Select + Create New in the navigation menu and then select Live Event Log from the API Analytics section.
The Live Event Log workspace shows the real-time stream of API traffic hitting your API. Events may take up to 5 minutes to show up in Moesif.

Next Steps
- Get started with Moesif.
- Learn how Moesif can help you achieve API observability in Kong Konnect.
- Explore Moesif API analytics and customer analytics.
- Explore other server integrations from Moesif.
- Learn to set up real-time monitoring and alerts.
- Invite team members to collaborate.