Importing Customer Data from CSV
A key component in leveraging metrics in Moesif is identifying calls by user and/or company. Using CSV import, you can enrich user and company data in Moesif with your business data. This allows you to import customer demographics, subscription status, or other business information readily available in another system, such as your customer relationship management (CRM) system.
If a user or company already exists in Moesif, Moesif merges any new columns in your CSV with their existing profile. This means that you don’t need to worry about data duplication. But remember that the customer’s user ID and company ID, if configured, must match between the CSV and the existing data in Moesif.
Importing Users Through CSV File
Follow these instructions to import user data using a CSV file.
Step 1: Prepare the CSV File
Create or generate a CSV file containing user attributes like name or job title. Follow this sample format:

Make sure that your CSV includes a column with the label user_id. If you want to use behavioral emails or automatic enrichment features, the CSV must have an email column as well.
Step 2: Import the CSV in Moesif
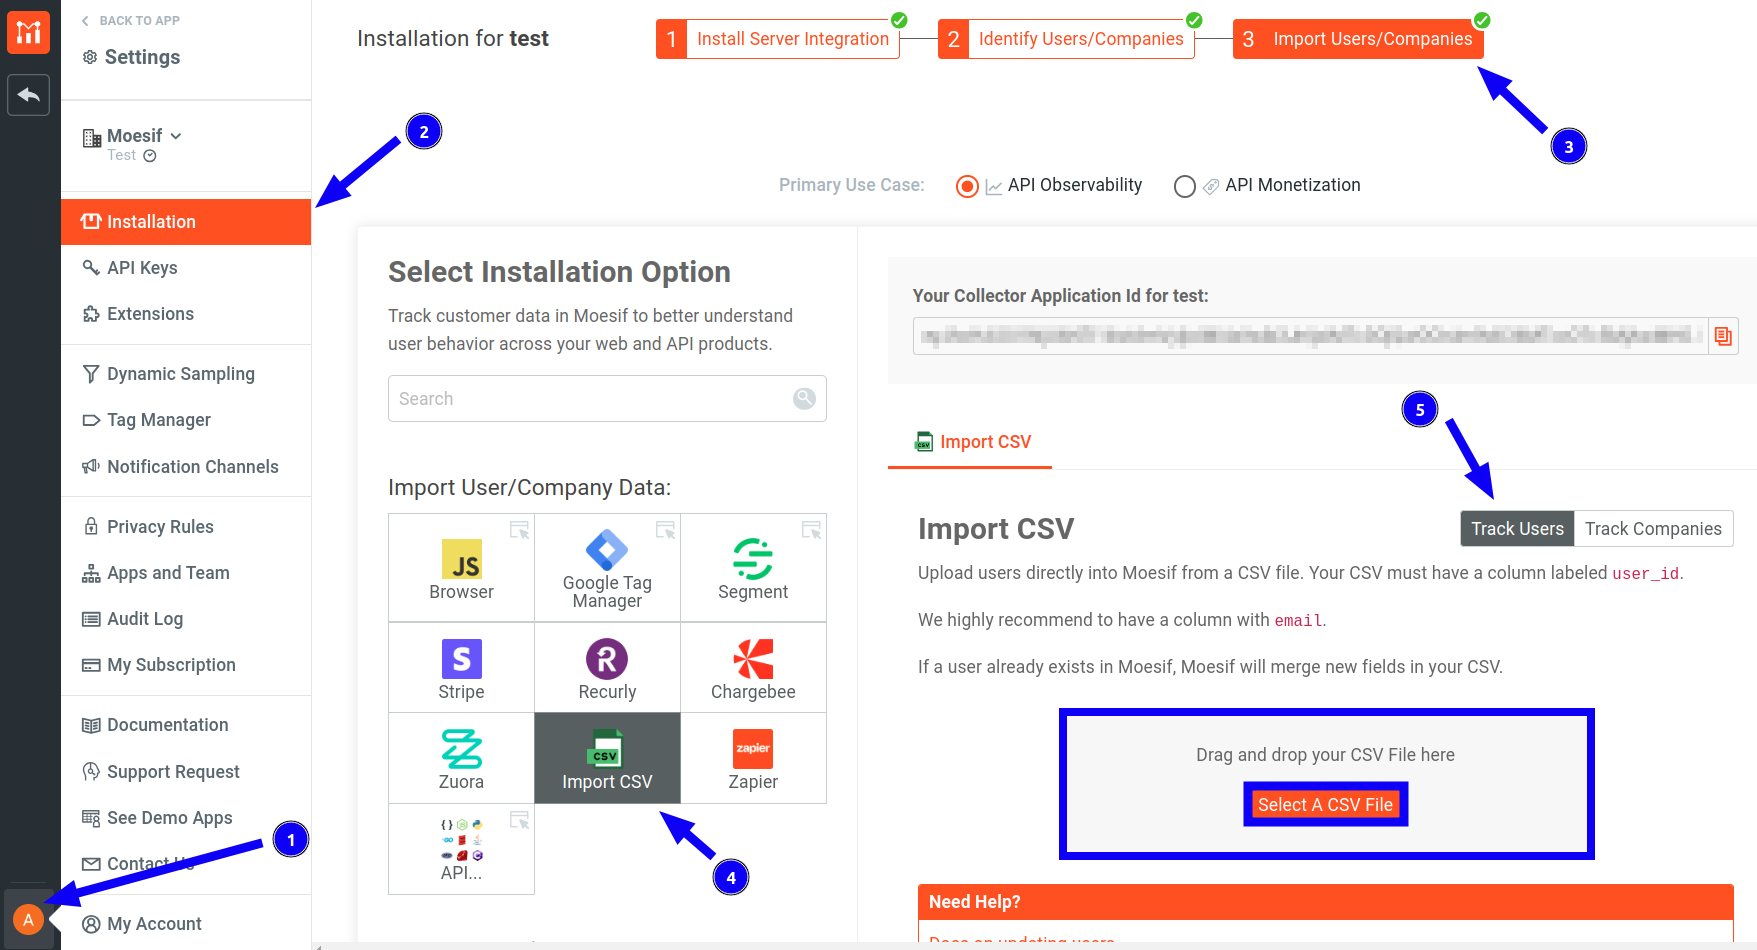
- From Moesif Portal, select your account icon to bring up the settings menu.
- Select Installation and then select Import Users/Companies.
- In the Select Installation Option pane, select Import CSV.
- In the Import CSV tab, make sure you select Track Users.
- Lastly, either drag and drop your CSV file onto the screen or select Select A CSV File.
After uploading the user CSV file, you can choose to either map the uploaded data fields to existing user profile fields or create a new field. To create a new field, enter the field name in the Moesif Field column fields and press Enter.
In the following example, we create two new fields: metadata.title and metadata.org.
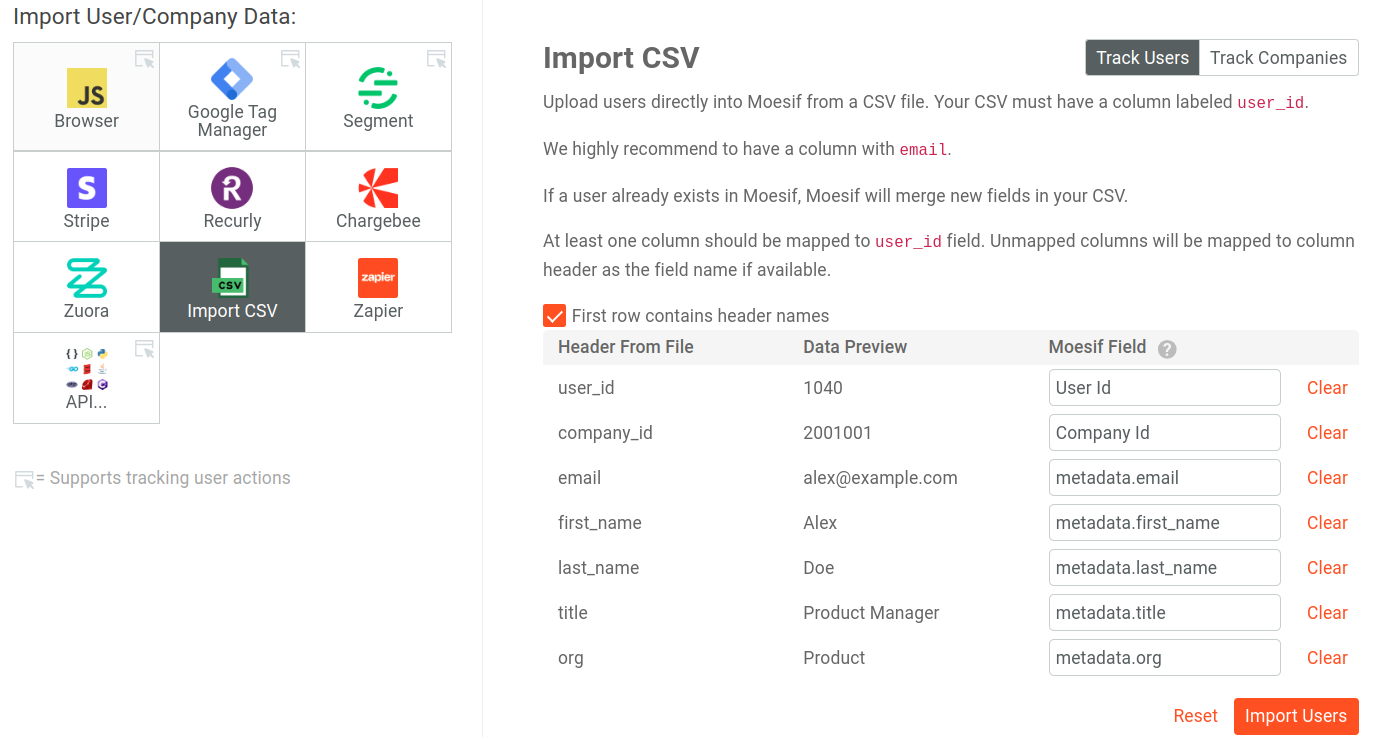
Finally, select Import Users.
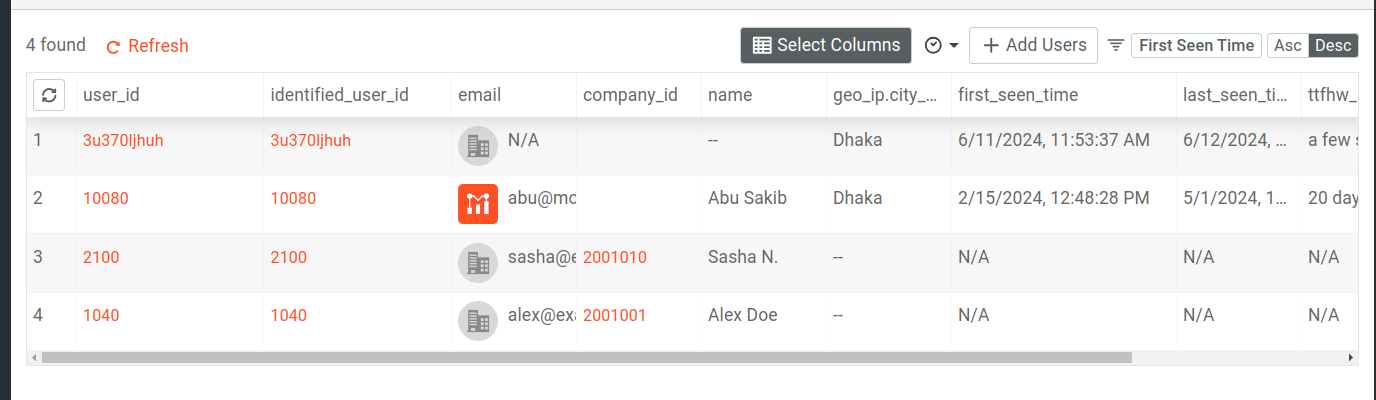
Once the user import process completes, you can view the details of the newly imported users in the User Lookup table.
To view the updated metadata fields, you can get the JSON data in the user profile page.
Importing Companies via CSV File
Follow these instructions to import company data using a CSV file.
Step 1: Prepare the CSV File
Create or generate a CSV file containing company information. Follow this sample format:

Make sure that your CSV includes a column with the label company_id. If you want to leverage Moesif’s automatic enrichment feature, set a company_domain column in the CSV file.
Step 2: Import the CSV in Moesif
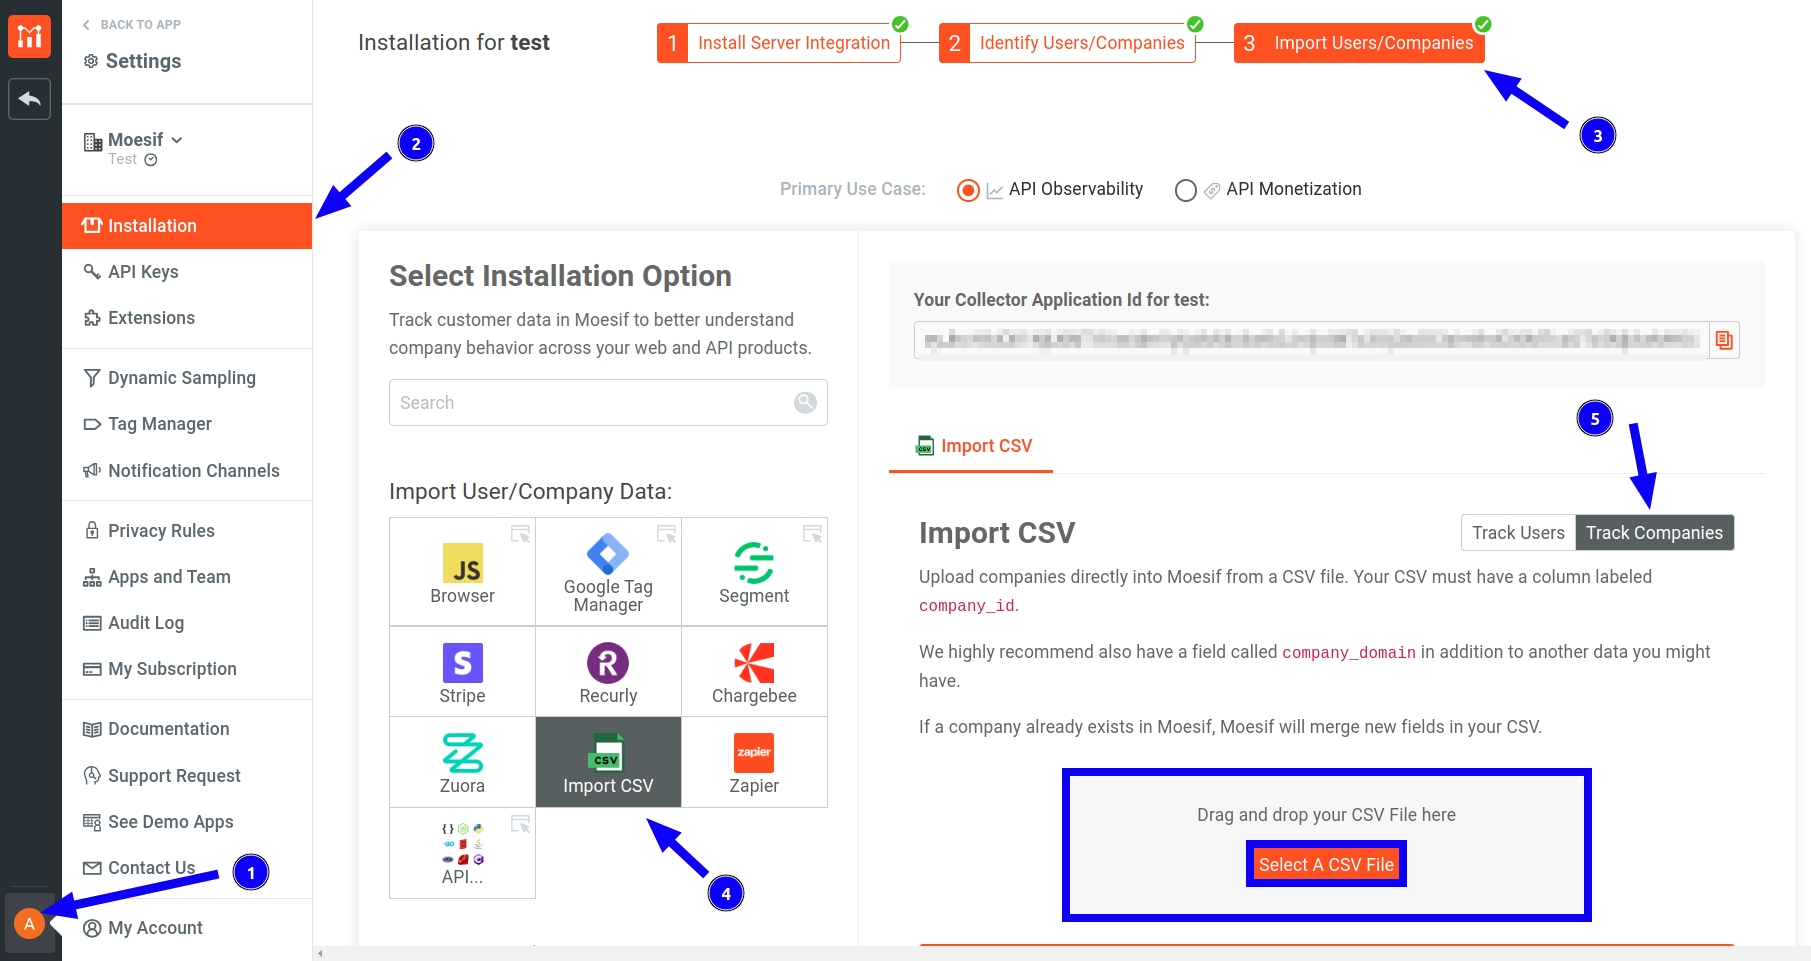
- From Moesif Portal, select your account icon to bring up the settings menu.
- Select Installation and then select Import Users/Companies.
- In the Select Installation Option pane, select Import CSV.
- In the Import CSV tab, make sure you select Track Companies.
- Lastly, either drag and drop your CSV file onto the screen or select Select A CSV File.
After uploading the CSV file, you can choose to either map the uploaded data fields to existing company profile fields or create a new field. To create a new field, enter the field name in the Moesif Field column fields and press Enter.
In the following example, we create four new fields:
metadata.company_namemetadata.plan_namemetadata.employee_countmetadata.mrr.
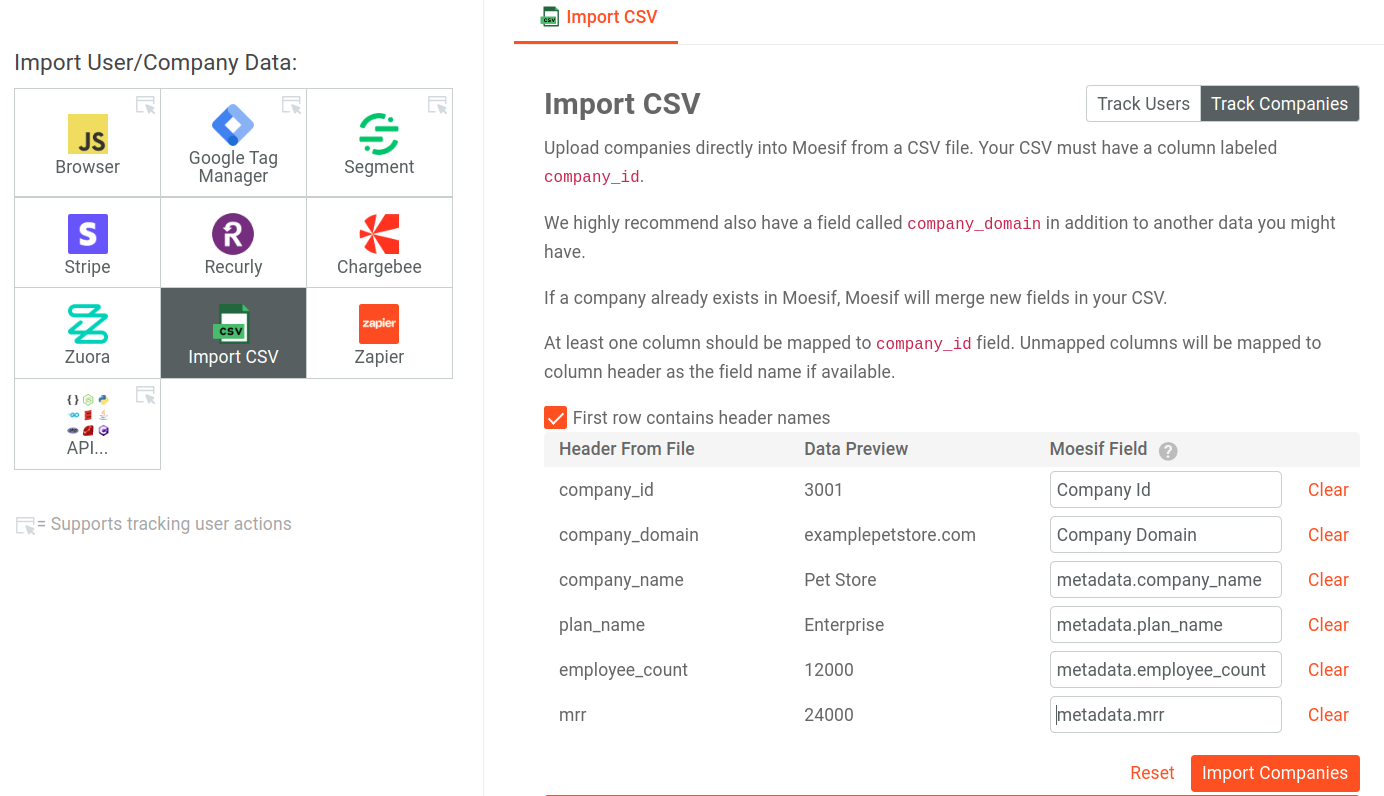
Finally, select Import Companies.
Once the company import process completes, you can view the details of the newly imported companies in the Company Lookup table.

To view the updated metadata fields, you can get the JSON data in the company profile page.