Single Sign-On: Microsoft Entra
Moesif provides a single sign-on integration with Microsoft Entra.
In order to set up SSO with Microsoft Entra:
- You must be an Microsoft Entra administrator
- You must be on a Moesif enterprise plan with SSO enabled
Benefits of SSO
- Improve security and regulatory compliance
- Reduce IT costs through auto-provision and de-provisioning
- Enforce policies like Multi-Factor Authentication (MFA), Password Reset, etc
- Improve usability for employees
How SSO works
Moesif supports both identity-provider (IdP) initiated and service-provider (SP) initiated single sign-on. When IdP initiated, a user logs in through your IdP’s app directory. When SP initiated, a user logs in by entering their employee email on Moesif’s website. Because their email domain has SSO enabled, they will be redirected to your organization’s single sign-on page. Once enabled, team management and role-based access control (RBAC) is handled by your identity provider rather than within the Moesif application.
Home Realm Discovery
Moesif’s SSO implementation supports Home Realm Discovery. This means SSO is enforced for your entire company domain even if a new employee is not yet added to your Moesif organization. This ensures employees cannot bypass SSO such as by entering a username/password. It also reduces your IT burden as employees never have to decide on what type of login they should use as redirect is automatic as soon as they enter their email.
Policies
Once SSO is enabled:
- Team members cannot log in with a username/password or social login (like GitHub).
- Password reset is disabled.
- Users can only be provisioned or de-provisioned by the IdP. You cannot modify team members within Moesif.
- Role-based access control (RBAC) is synced from your identity provider and cannot be changed within Moesif.
Enterprise Single Sign-On is available only on enterprise plans.
How to setup Microsoft Entra with Moesif
This guide is for OIDC-based SSO which is recommended over SAML for newer installations.
Step 1: Create a New Enterprise Application in Microsoft Entra
Log in to Microsoft Entra:
- Access your Microsoft Entra admin portal.
- Navigate to Enterprise applications:
- Go to
Azure Active Directory>Enterprise applications.
Create a New Enterprise Application:
- Click on
New application. - Click
Create your own application - Enter a name for your application (e.g., “Moesif Integration”).
- Ensure
Integrate any other application you don't find in the gallery (Non-gallery)is selected -
Click Create
- Set the
PlatformtoWeb. - Set the
Redirect URItohttps://auth.moesif.com/login/callback. - Click
Register. - Make note of the
Application (client) ID. Moesif will need this later.
Step 2: Configure Linked App Registration
Navigate to App registrations:
- Go to
Azure Active Directory>App registrations. - Select
All applications - Find the linked app registration for your newly created Enterprise application.
Set Authentication Settings:
- In the newly created application, navigate to
Authentication. - Select
Add a platformand selectWeb. - Set the
Redirect URItohttps://auth.moesif.com/login/callbackand click Configure - Under
Implicit grant and hybrid flows, ensureID tokens (used for implicit and hybrid flows)is checked. - Click
Save.
Step 3: Create App roles
- In the newly created app registration, navigate to the
App rolespanel. - Click “Create App role”
- For Allowed Member Types, select
Both (Users/Groups + Applications) - Set the value to
admin. You can give it a friendly name and description.
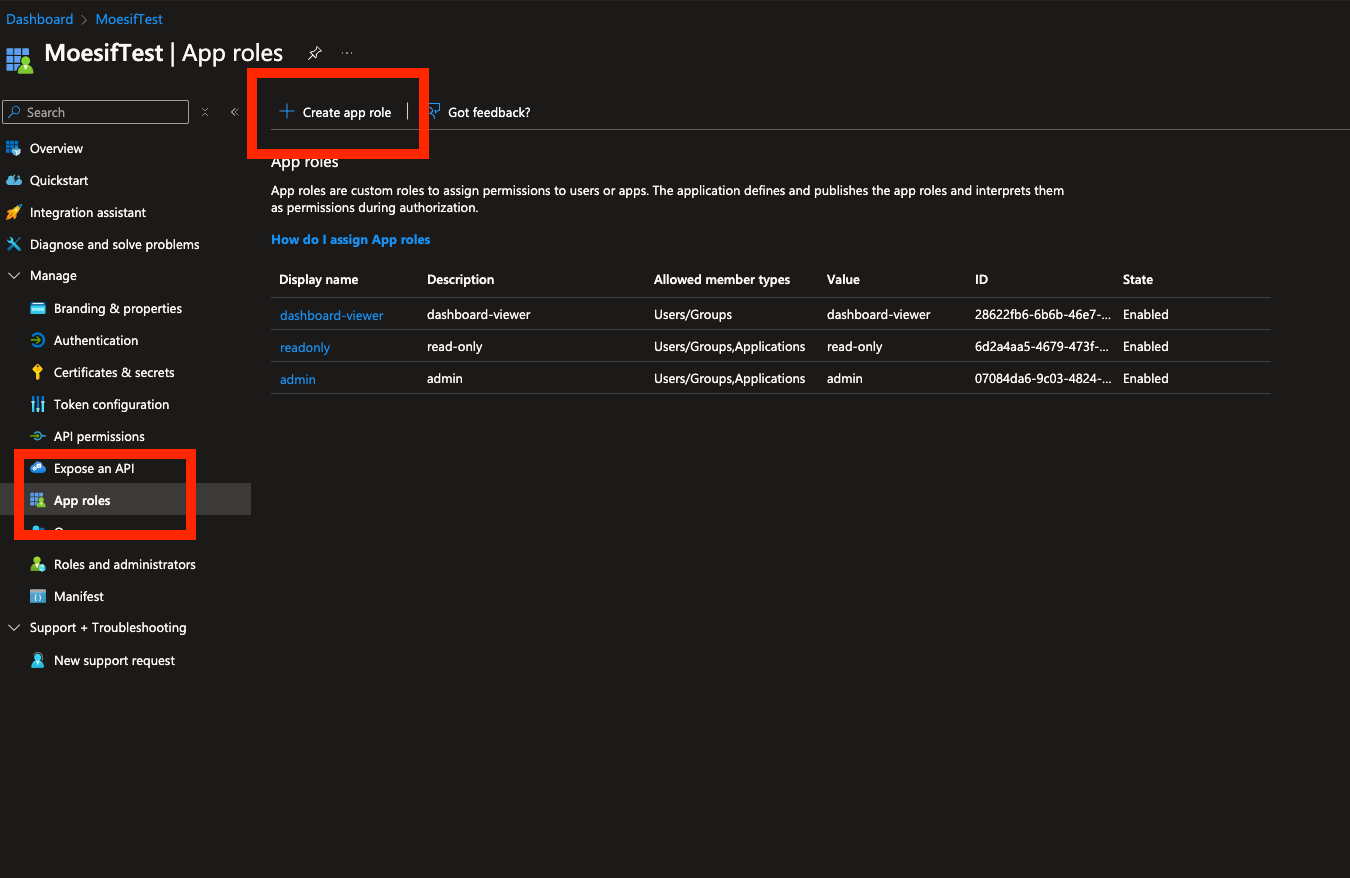
Repeat creating additional roles for all values below:
adminmemberread-onlydashboard-viewer
If your Moesif subscription has any custom roles, you can also add their names to this list.
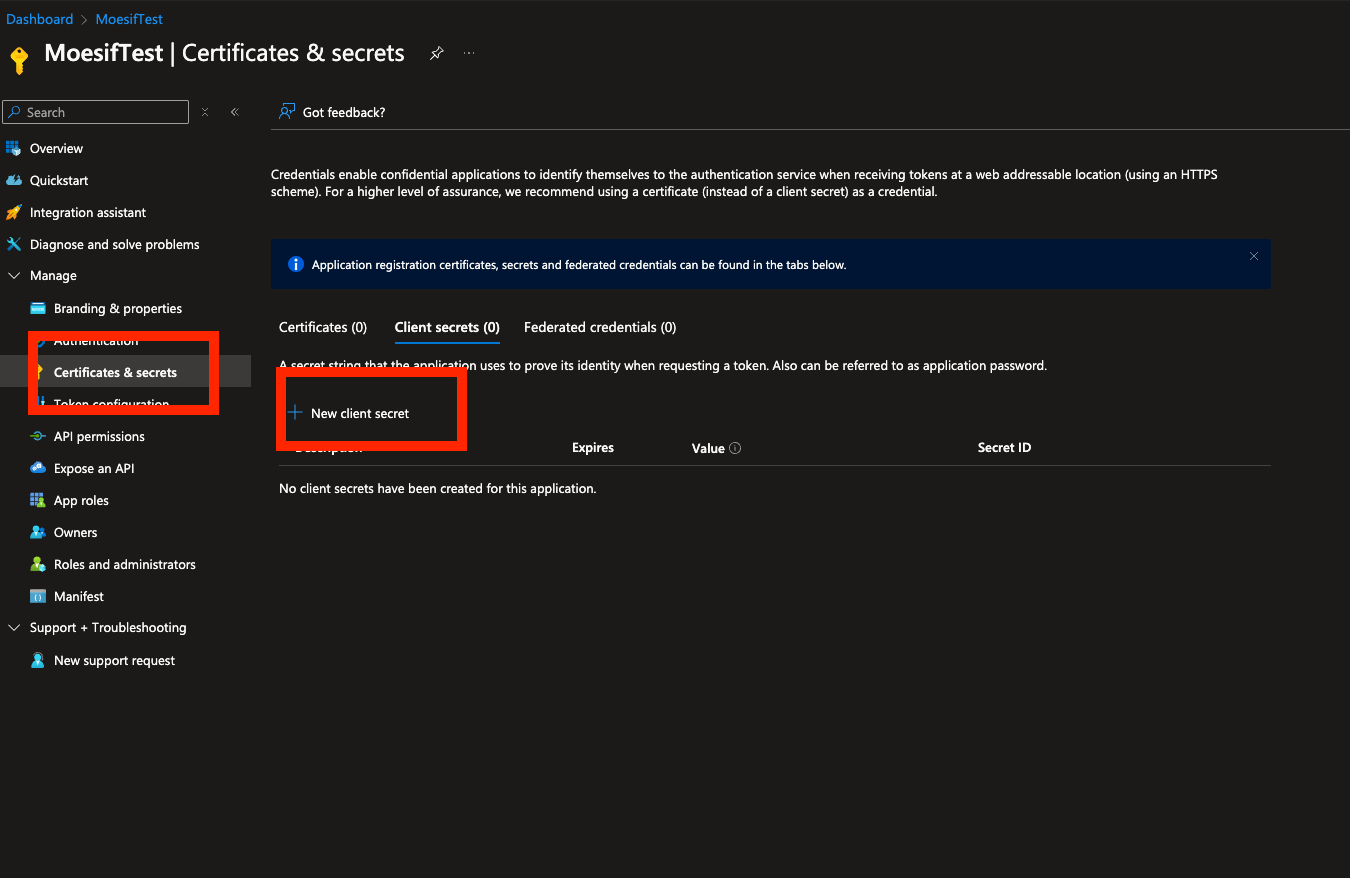
Step 4: Configure Certificates & Secrets
Certificates & Secrets:
- Navigate to
Certificates & secrets. - Click
New client secret. - Add a description (e.g., “Moesif Secret”).
- Set an expiration period.
- Click
Add. - Copy the
Valueof the client secret. Make note for the Moesif team. You will need this later.
Step 5: Share with Moesif
Send an email to your customer success representative or to support@moesif.com with the following information:
- Your Application (client) ID
- Your Entra domain
- Your Client Secret
Step 6: Test the Integration
Test Authentication:
- Navigate to your Moesif application.
- Attempt to log in using Microsoft Entra credentials.
- Ensure that the authentication flow completes successfully and that you are redirected back to Moesif.
Enable SCIM Provisioning (Optional)
If you want users to be deleted and updated automatically, you can also configure SCIM.
- Within the enterprise application, select
Provisioningfrom the left - Under
Provisioning Mode, selectAutomatic. - Open the panel
Admin Credentials, and enter the SCIM Endpoint URL and token provided by Moesif - Open the panel
Mappingsand select ` - Ensure
Provisioning Statusis set to On - Select
Users and groupsfrom left side and selectProvision Microsoft Entra ID Users - Find the custom attribute
externalIdand selectEdit. Changesource attributetoobjectidand precedence to 3. Click Ok. - Find the custom attribute
emails[type eq "work"].valueand selectEdit. ChangeMatch objects using this attributetoYesand set matching precedence to 2. Click Ok. - It should look like below:
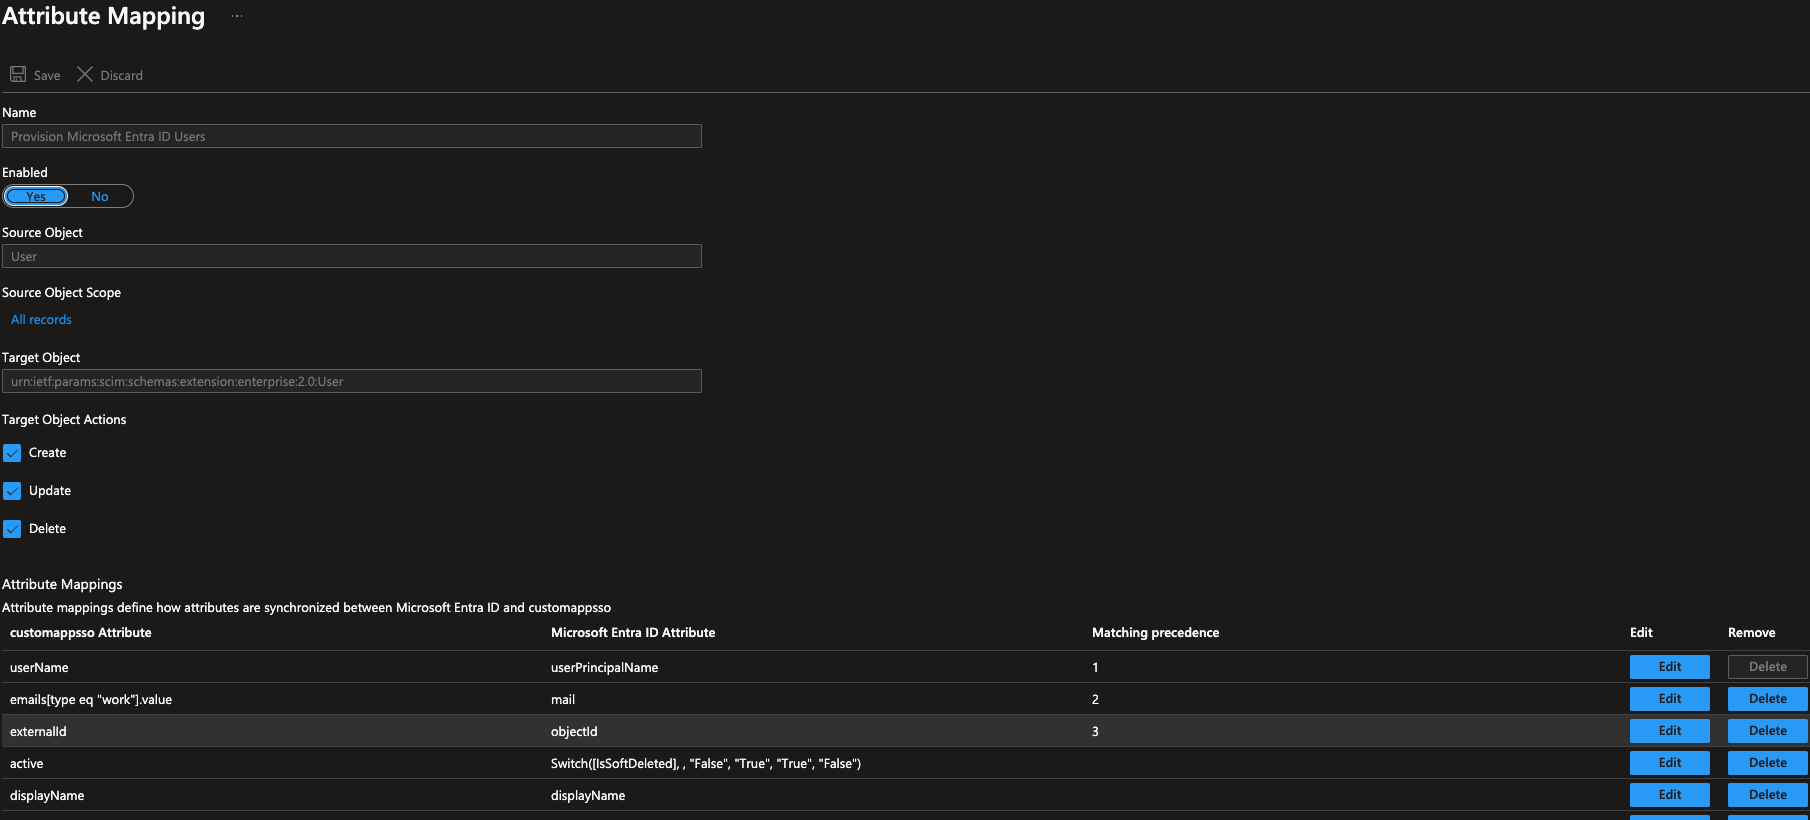
- Lastly, ensure
Provisioning Statusis set toOn.
Once enabled
Any employee logging in with your company’s domain will automatically be redirected to the single sign-on page where they can click log in. All team management and role-based access control actions is done through your identity provider. Moesif automatically syncs user accounts.
Disabling SSO
An organization can disable SSO at any time by contacting their technical account manager. Once disabled, existing team members who already had an account prior to SSO can log in with their password. New users who were provisioned through SSO can reset their password to log in.