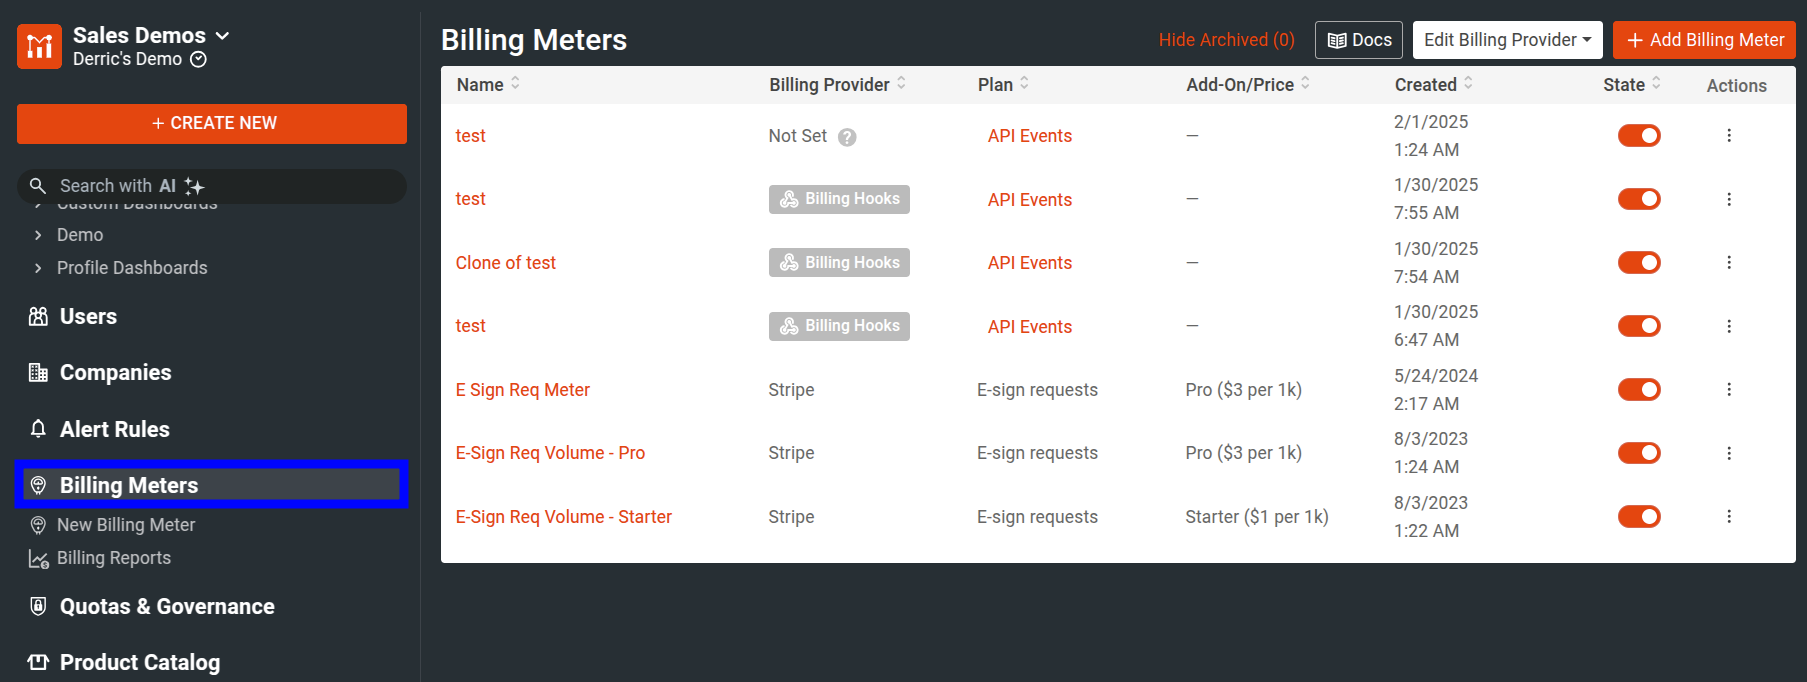
Managing Billing Meters
This page describes how you can manage your existing Billing Meters.
Select the Billing Meters menu item in the navigation menu to open the Billing Meters screen.

The Billing Meters screen shows you a list of all billing meters that you have created. From here, you can manage your meters and perform actions like editing, cloning, and archiving meters.
Edit and Update Existing Billing Meters
- Select Billing Meters from the navigation menu.
- Select the name of the Billing Meter you want to update. Alternatively, select ⋮ Actions for the Billing Meter you want to udpate and then select View Details.
- Make your edits.
- Select Update.
You can only update the name, status, and price of a Billing Meter. To ensure proper audit history, the rest of the Billing Meter details become locked out of any further changes once you create the meter.
Enable and Disable Billing Meters
- Select Billing Meters from the navigation menu.
- Select the name of the Billing Meter you want to enable or disable and then select the On | Off toggle. Alternatively, for the Billing Meter you want to enable or disable, select the corresponding toggle in the State column.
Archiving a Billing Meter
- Select Billing Meters from the navigation menu.
- Select ⋮ Actions for the Billing Meter you want to archive and then select Archive.
- Select Archive Billing Meter to confirm.
Keep the following in mind when you archive a Billing Meter:
- For audit reasons, you cannot delete a Billing Meter.
- Once you archive a Billing Meter, you cannot enable the Billing Meter again.
If you simply want to just make the plan inaccessible for a temporary period, disable the meter instead.
Cloning a Billing Meter
- Select Billing Meters from the navigation menu.
- Select the name of the Billing Meter you want to clone.
- Select Copy.
- Make your edits.
- Select Create.
Alternatively, select ⋮ Actions for the Billing Meter you want to clone and then select Clone.