Creating a Billing Meter With Chargebee
If you’re looking to monetize your APIs or your application, metered billing could be a perfect solution. With metered billing, users usage is tallied up throughout a designated period and that is how they are billed. Billing meters Moesif will automatically meter the usage for each company and charge your customers via Chargebee. They support a variety of billing models including prepaid, postpaid, Pay As You Go (PAYG) and more. If you have different features or metrics you need to charge on, you can create multiple meters in Moesif, each linked to a different plan in Chargebee. The integration also syncs subscription and revenue data from Chargebee to Moesif so you can understand how API usage translates to revenue.
A graphical overview of the process looks like this:

In this walk-through, we will create a very simple billing meter that integrates and publishes usage data to Chargebee.
To follow this guide you will need:
- A Moesif account and successful integration with your API(s)
- A Chargebee account with Metered Billing enabled
There are a few steps after you’ve integrated with Moesif to get you to the point where you can collect revenue. These steps include:
- Adding the Moesif webhook to Chargebee
- Plugging the Chargebee API details into Moesif
- Setting up products and prices in Chargebee
- Configuring and activating the Billing Meter in Moesif
Let’s get started!
Step 1: Configuring Chargebee in Moesif
Moesif’s connection with Chargebee involves 2-way communication. Moesif has created a simple way to get all the info you need and to configure certain variables for Chargebee in a single screen. To access the Chargebee setup details screen, you can follow one of these methods:
Access From Account Settings Menu
- Select your account icon to bring up the settings menu.
- Select Extensions.
- Search and select Chargebee.
Access From Billing Meters Page
- Select Billing Meters in the navigation menu to open the Billing Meters screen.
- Select Edit Billing Providers dropdown
- Select Chargebee.
Access From New Billing Meter Creation Page
- Select Billing Meters in the navigation menu to open the Billing Meters screen.
- Select + Add Billing Meter.
- Select Set up Chargebee from the Select Billing Provider dropdown.
Once you’ve opened the configuration screen through one of the routes above, you can get the info needed to add the Moesif Webhook to Chargebee, inputs to plug the Chargebee API into Moesif, and customize your Customer ID source in a single place.
Step 2: Adding the Moesif Webhook to Chargebee
Adding the Moesif Webhook to Chargebee
In Chargebee, you need to add Moesif webhook through which Chargebee can send subscription updates to Moesif. Follow these steps in your Chargebee site to add the webhook after logging into your Chargebee account:
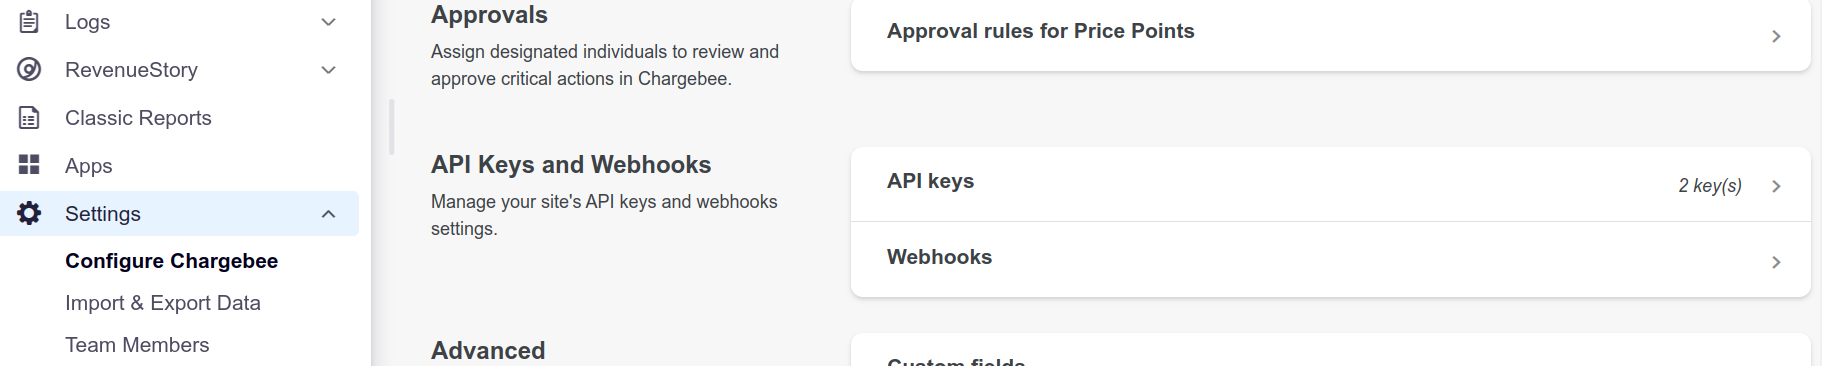
- Select Settings and then select Configure Chargebee in the navigation pane.
- In the API Keys and Events section, select Webhooks and then select + Add Webhook.
![Accessing webhook settings in Chargebee site]()
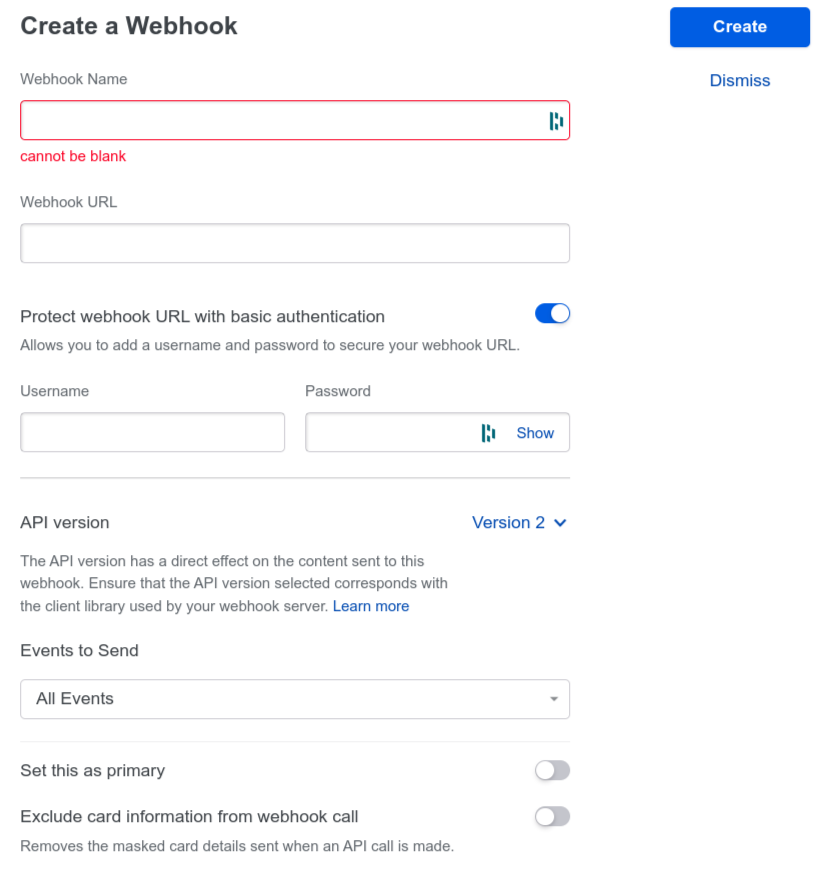
- In the Create a Webhook dialog, enter the webhook details.
- Enter a name for the webhook.
- Select the Protect webhook URL with basic authentication toggle to the on position.
- Add the Moesif Webhook URL into the Webhook URL field and the Moesif Application ID into the Username field.
- Select Create.
After you create the webhook succesfully, it appears in the API Keys and Webhooks screen. From here, you can also test the webhook by selecting Test Webhook.
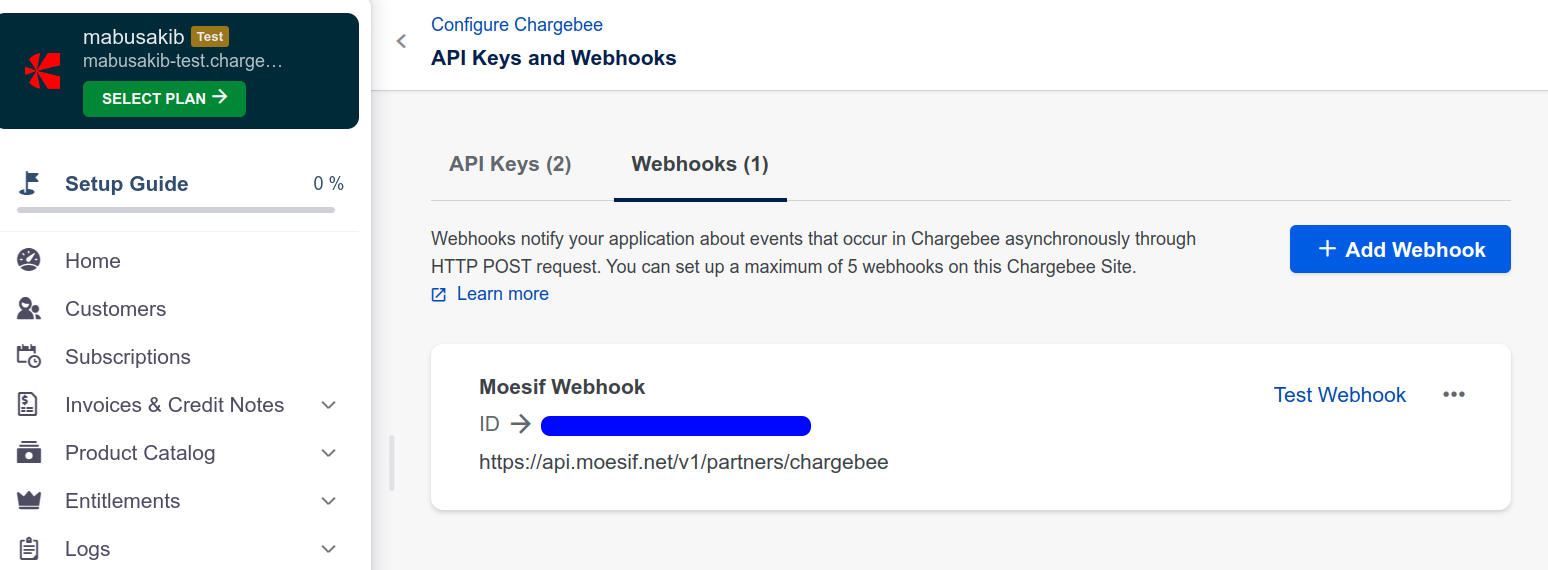
Then select Test URL. The results show a Successfully received OK response from the webhook message with the request details.

Step 3: Adding the Chargebee API key to Moesif
In Moesif, you will need to plug in the Chargebee API details so that Moesif can post usage details to Chargebee to bill upon. These details can be entered into the Chargebee API Key, and Site fields on the Chargebee Setup Details screen. Make sure you’re using Chargebee API Version v2 or higher.
Moesif supports Chargebee API v2 or higher.
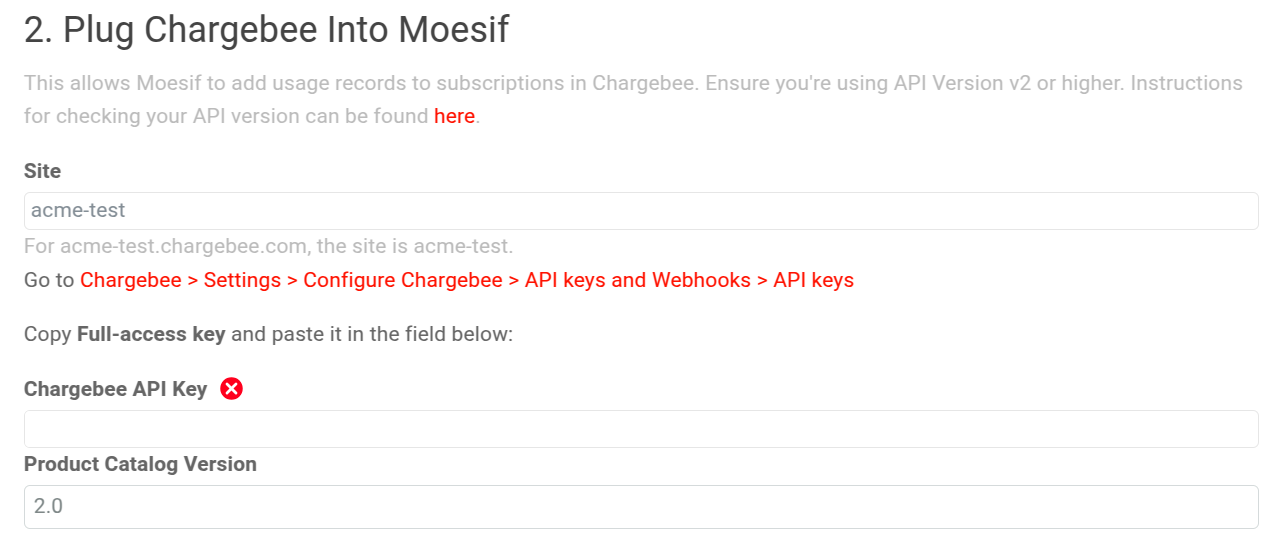
To get the Chargebee API key from your Chargebee site, follow these steps:
- Select Settings and then select Configure Chargebee in the navigation pane.
- In the API Keys and Events section, select API keys tab and copy the full access key.
- Paste the key in the Chargebee API Key field of the Chargebee setup details dialog in Moesif.
Lastly, grab the your Chargebee site name from your URL bar in your browser and paste it into the Site field. For example, if the URL is
example-test.chargebee.com, your Chargebee site name is example-test.
The filled out entries will look similar to this.
Once completed, be sure to select Save.
Step 4: Enabling Metered Billing in Chargebee
Next, we will turn on Metered Billing in Chargebee by following these steps:
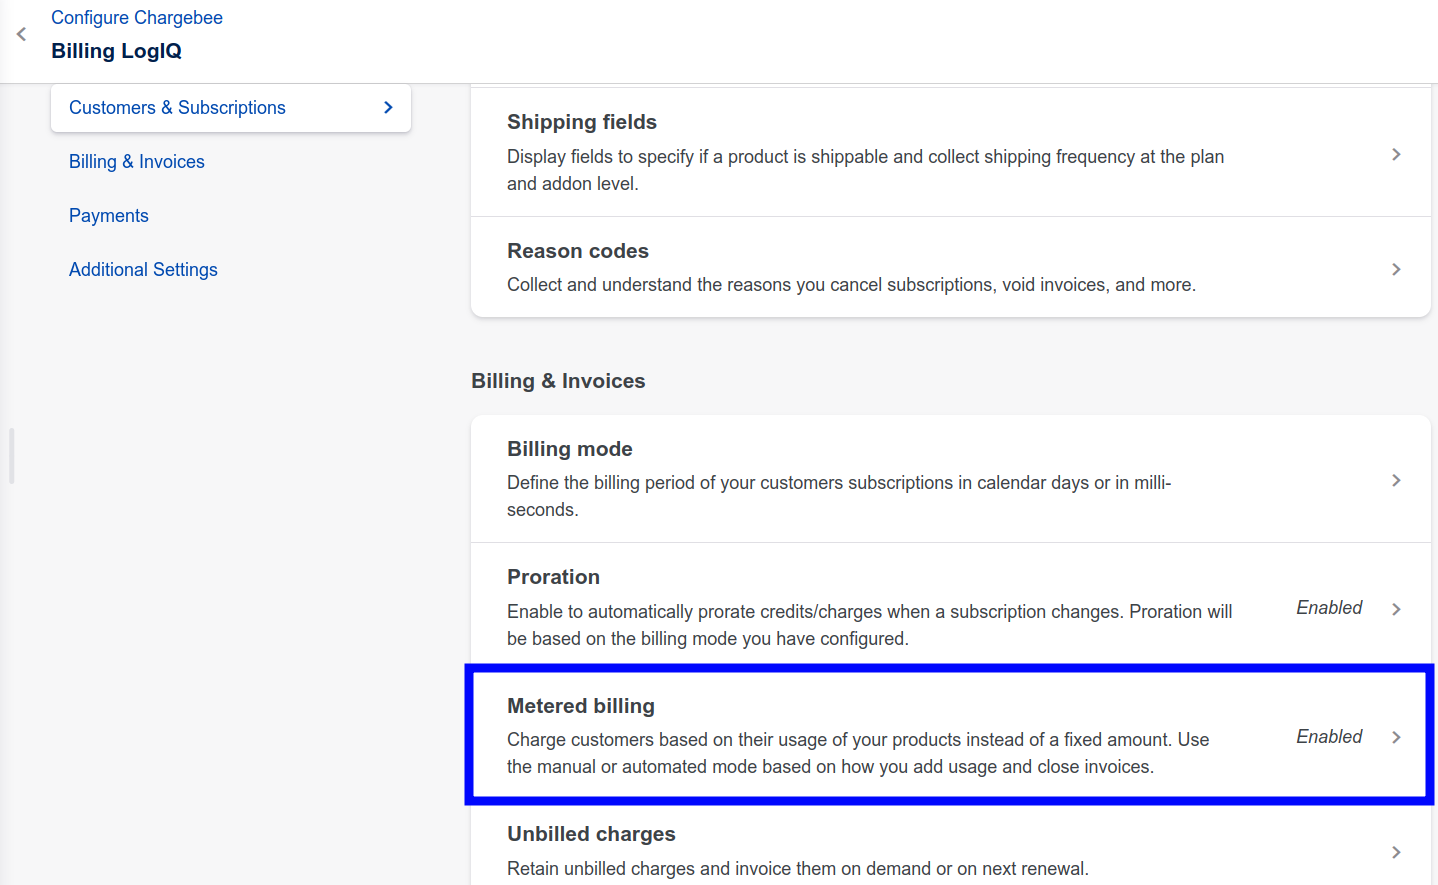
- Navigate to the Configure Chargebee screen and select Billing LogIQ from the Billing section.
- Select Metered Billing in the Billing & Invoices section.
- Enable Automated metered billing and then select Enable again to confirm.
If the Metered Billing option is not available, you will need to contact Chargebee and ask them to enable Metered Billing on your site. This can be done by emailing Chargebee support.
You will then want to set your desired configuration (the recommended configuration is in the image below) and select Apply.
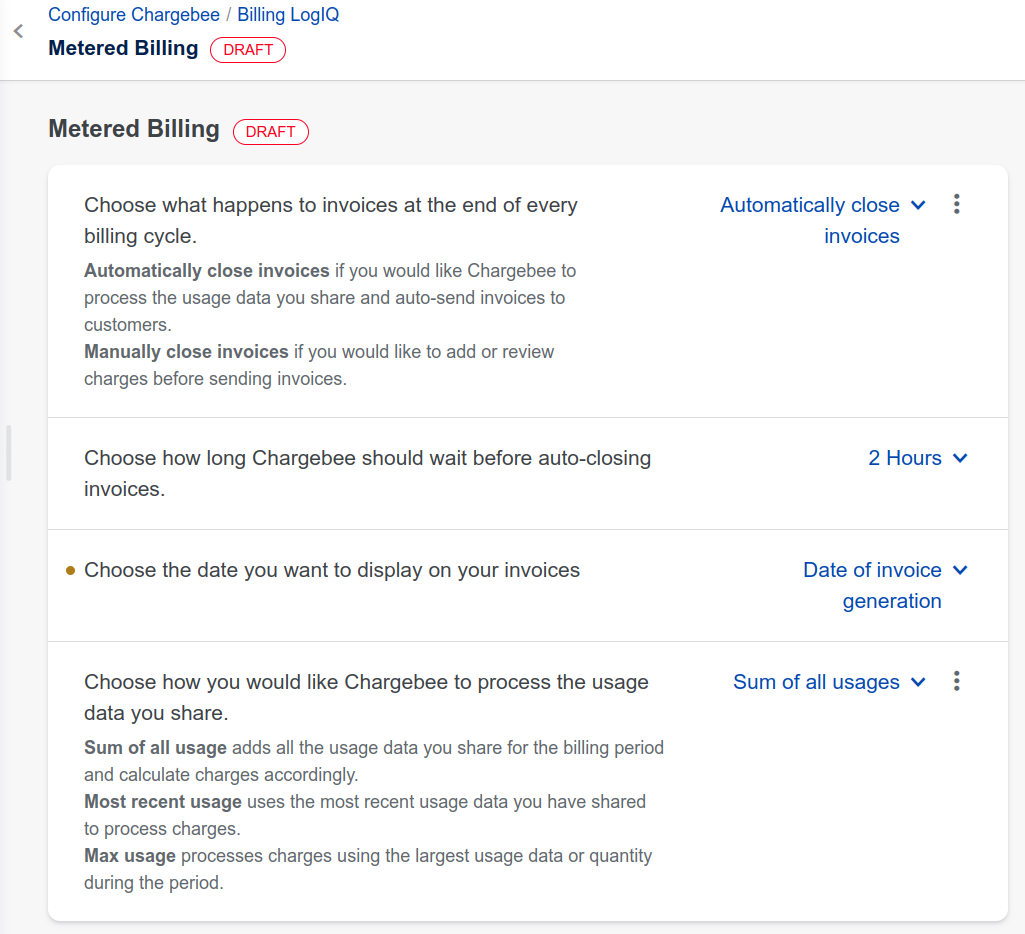
Then you will see a confirmation message pop up regarding your changes. Here you will select Confirm.
Step 5: Creating the Products
After the above config is complete and integration steps are done for connecting Chargebee and Moesif, follow these steps to create products:
- Select Product Catalog and then select Product Families in the navigation pane.
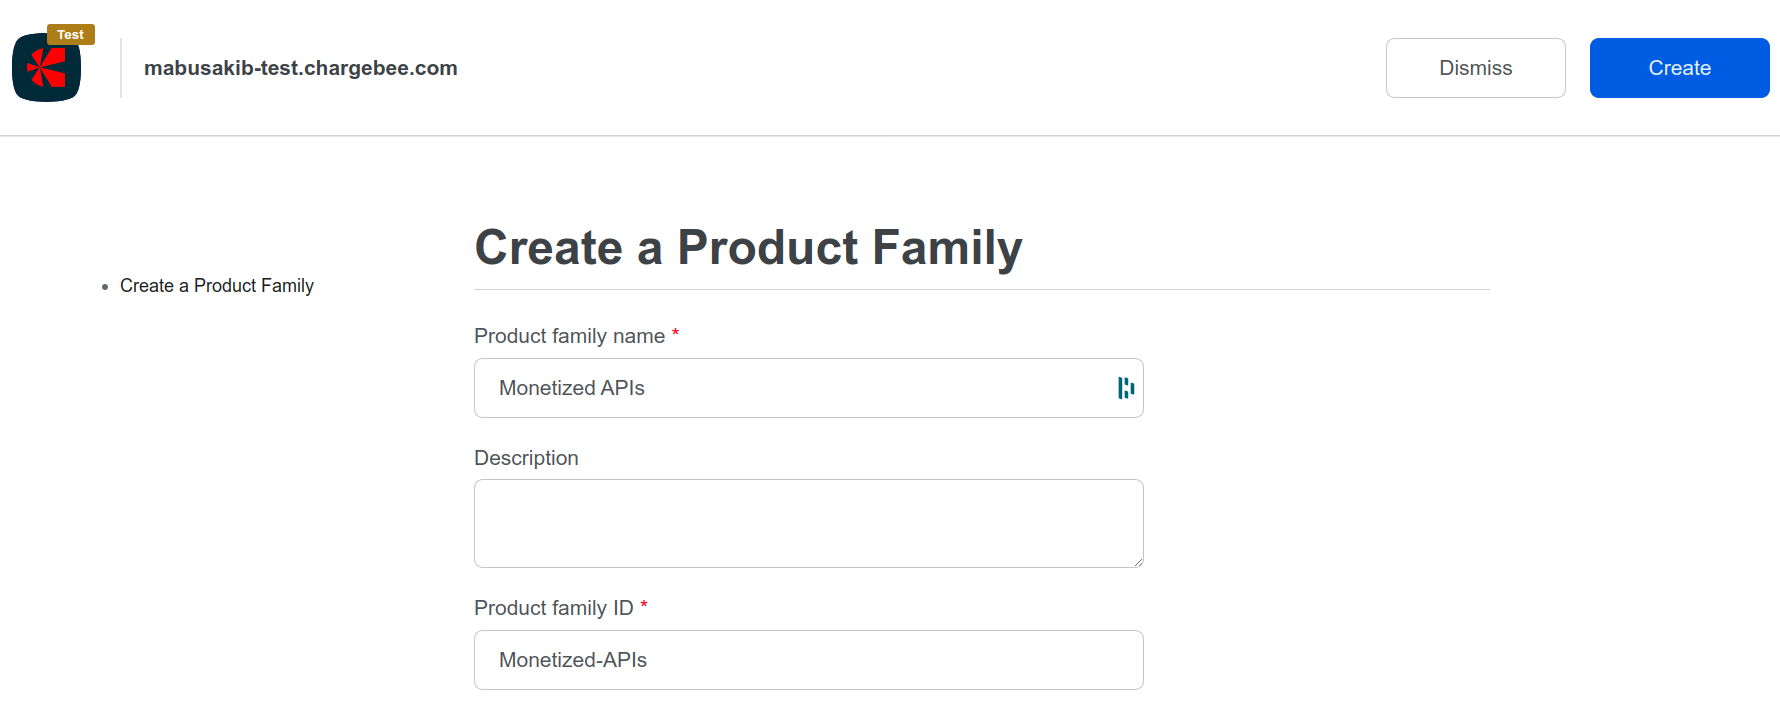
- Select Create Product Family.
- In the Create a Product Family screen, add your Product Family name. Then select Create. For example, here we create a Product Family named “Monetized APIs”.
![Creating a product family.]()
After creating a Product Family, follow these steps to create a Plan.
- Select Product Catalog and then select Plans in the navigation pane.
- Select + Create Plan.
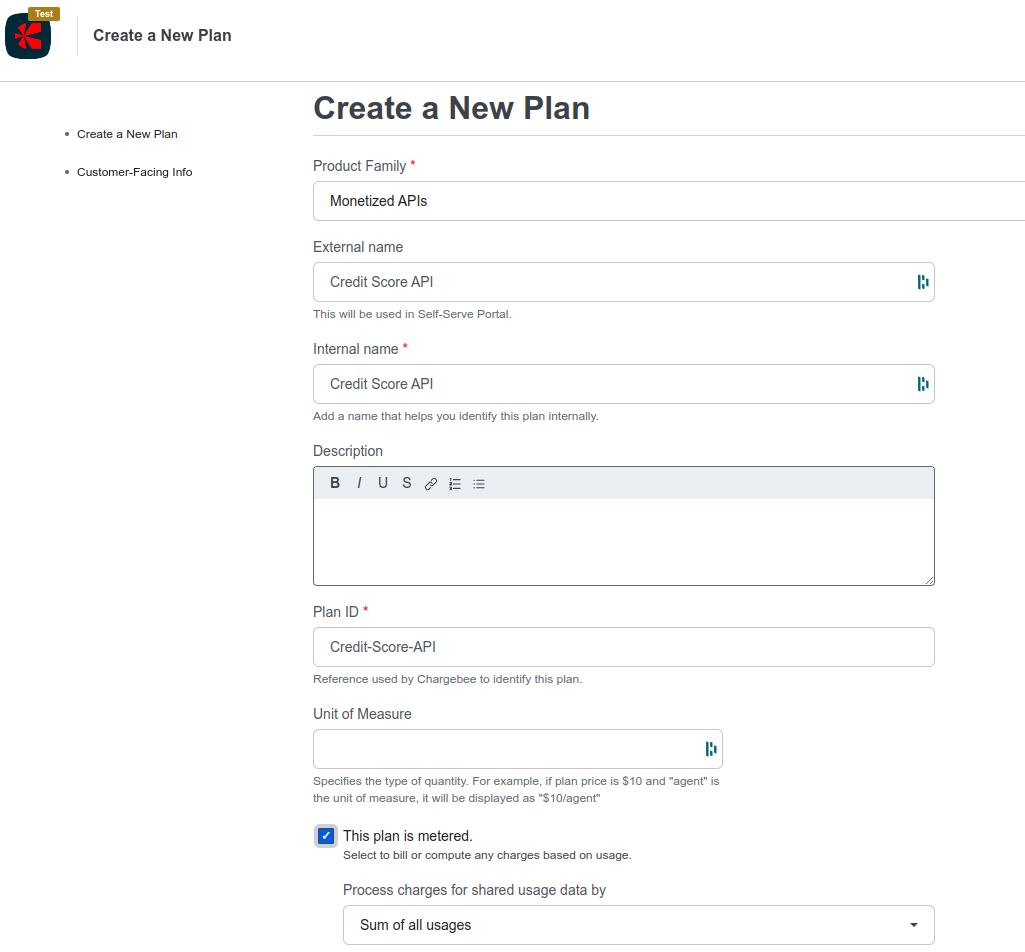
- In the Create a New Plan screen, you need to enter the following Plan details:
- Product Family
- External name
- Internal name
You must also select the This plan is metered checkbox.
- Select Create.
![Creating a new plan.]()
After you successfully create the plan, the detailed view of the plan appears. From here, we can add the pricing details.
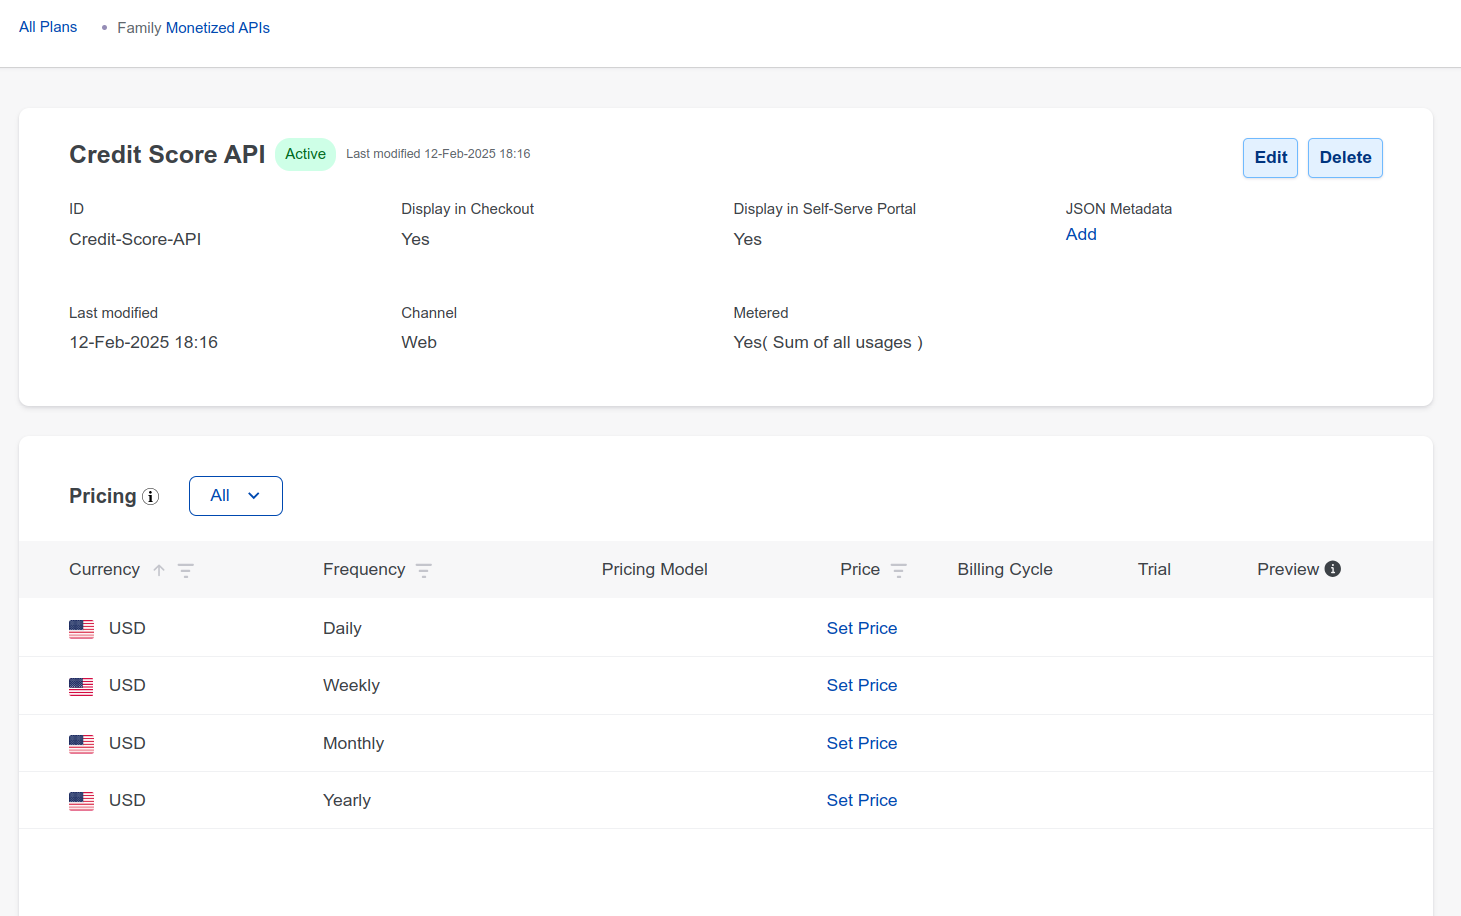
Since we will be invoicing monthly, in the Pricing table, select Set Price in the Monthly billing frequency row.
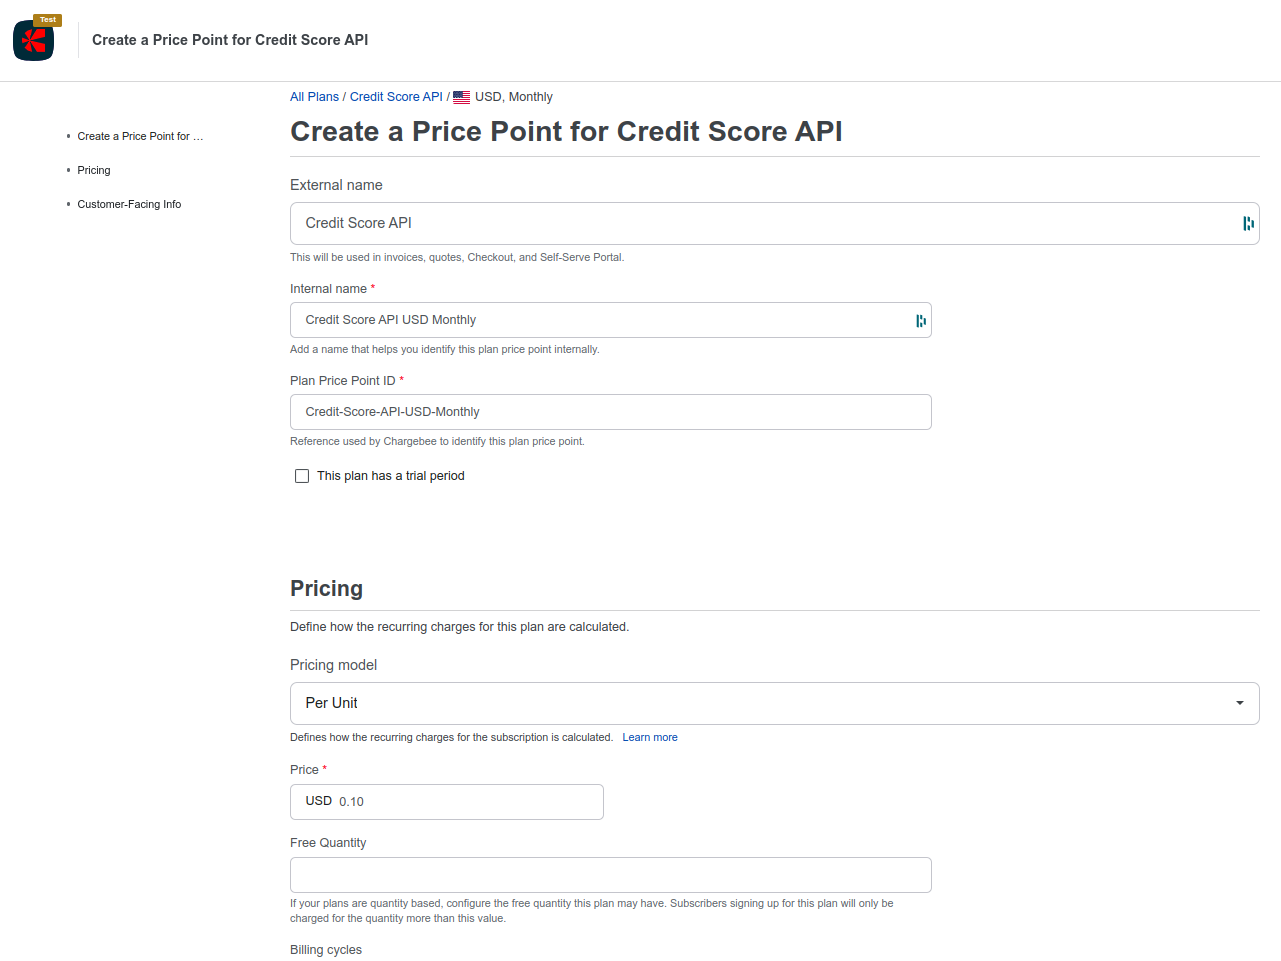
In the next screen, we will then set the price for this unit of usage. In this example, we set the price to $0.10 per unit. After setting those details, select Create.
Step 6: Creating the Billing Meter
Now that we have a Plan and a Price set up in Chargebee, we can create a billing meter in Moesif to calculate usage and send to the usage details to Chargebee. You must create a price for the plan in Chargebee; otherwise, the Chargebee plan doesn’t appear in Moesif when creating a billing meter.
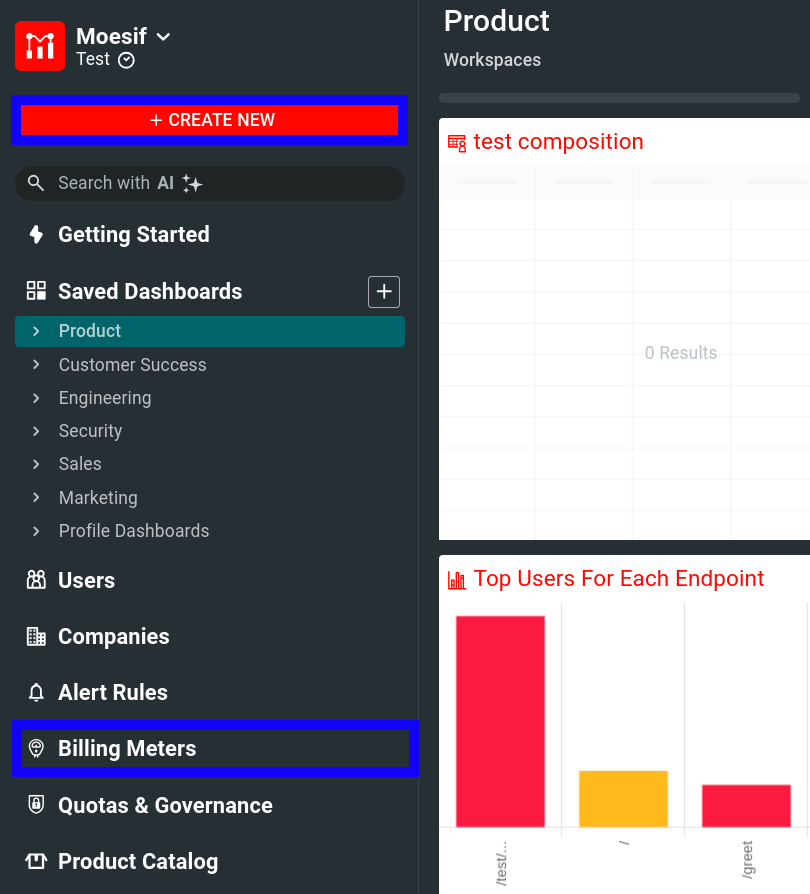
To create a new Billing Meter, select Billing Meters menu item in the navigation menu and then select + Add Billing Meter. Alternatively, select + Create New in the navigation menu and then select Billing Meter from the API Monetization section.
Once on the Add Billing Meter screen, you’ll add in:
- Billing meter name
- Billing provider info
- Add the filter to specify what events to bill upon
For example, here we use “Chargebee Billing Meter” but this can be whatever is most relevant to you.
As billing provider, you will select Chargebee and pick the Item Plan and Item Price ID that you’d like usage metrics to be attached to.
Then, you will set up the event filter which outlines which events should be billed upon. In this example I want to charge for any successful call to the /getCreditScore endpoint.
Lastly, we will select the metric to bill upon. In this example we use Event Count so that every event will be result in a charge. Other options in the Metrics dropdown include:
- Unique Users
- This will create a charge for each unique user who uses the endpoint.
- Unique Sessions/API Keys
- This will create a charge for each unique session or API key that access the endpoint.
- Custom
- This allows you to dial in a custom metric to bill upon if the above don’t fit your needs.
Once you have these details filled out, you’ll select Create.

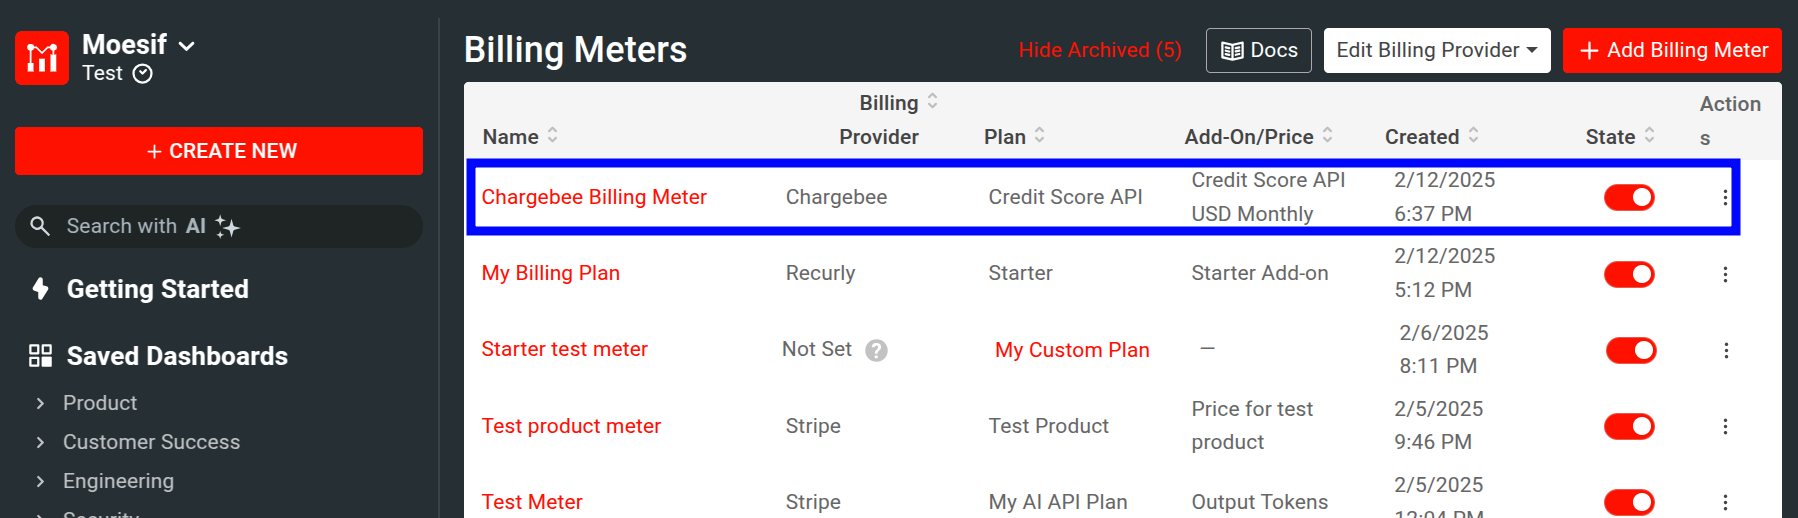
Now, you’re billing meter will be available on the Billing Meters screen. After a short period of time and API usage, you will begin to see usage data flow over into Chargebee.
Note that User and Company tracking must be enabled in Moesif and the correct mapping of values is required to make sure that usage records get associated with the correct subscription. For more info on this, check out the docks which outline these particulars.
Now, we have successfully created a billing meter that will begin to send usage data to Chargebee. This integration is possible in a matter of minutes with no code required.